Load Cartridge Check
Use the LC_UDP.script (Load Cartridge User Defined Protocol) to validate the proper transfer of fluid from the strip to the PCR cartridge. By entering the proper parameters, the Load Cartridge step of a run can be performed separate from Sample Prep and PCR, which saves approximately two hours.
The Load Cartridge Test can be completed with the Load Cartridge Kit (445028) to avoid wasting snap ins and tips in an entire qualification kit.
- Up to 24 Strips from BD MAX™ Instrument Qualification Kit (SAP Catalog No.444048; standard BD MAX™ kit size)
- 1 or 2 Micro Fluidic Cartridges (SAP Catalog No. 437519; box of 24)
- Load Cartridge Test Kit (445028)
Use one test strip for each lane being tested. In this example, four lanes are tested.
- Obtain and use proper protective equipment (i.e. gloves, safety goggles, lab coat, etc).
- Remove the needed number of conical tubes from the Load Cartridge Test Kit. For example, if testing 4 lanes, 4 conical tubes will be needed.
- Snap in one conical tube into position 4 of the URS.
- After completing Load Cartridge Test, do not discard the URS.
- Add approximately 25 µL of fluid to the third or empty snap in that is pre mounted on the strip.
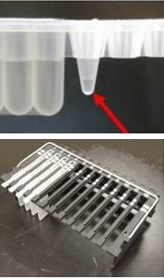
- Examine each URS to ensure that there are no bubbles in the snap-in; t URS should also contain a small, 175 µL pipette tip, in the number four position of the strip. The LC_UDP.script attempts to pick up 12 µL from this snap in and transfer it to the PCR cartridge.
- Place the rack with the prepared Unitized Reagent Strips into the instrument.
- Place a PCR cartridge in the corresponding reader.
- From Script-O-Matic, run an init.script to initialize the instrument before performing this test.
- Select the LC_UDP.script from the Robot (Huey) MUX board for each bank to be run.
- Bank 1 is A1 to A4
- Bank 2 is A5 to A8
- Bank 3 is A9 to A12
- Banks 4 to 6 repeat on the B side.
- Use the arrow to the left of the bank number to open up the additional options.
- There are five lanes.
- The first four correspond to the four rack strips (example in bank 1, Lane 1 is A1, lane 2 is A2, lane 3 is A3, and Lane 4 is A4).
- The fifth Lane is used to determine top or bottom cartridge row. If left blank it defaults to TOP row. Typing in the word BOTTOM selects the bottom cartridge row.
- From the right hand drop down menu select DNA-1 Type3 (E1TYPE3) for each lane being tested
- Continue to enter each strip position to be tested. Once complete, select the Launch icon.
- When the script is launched, the Z head moves and picks up 12 µL of fluid with the #4 small tip from the number three snap. It then moves to the cartridge and aspirate the fluid into the corresponding micro fluidic channels.
- Observe that the correct volume is picked up and transferred and that the associated cartridge chambers are properly filled.
Reboot both the instrument and the All-In-One after exiting from Script-O-Matic.
For software version V4.50 and above, the Load Cartridge Test function allows the FSE to run the Load Cartridge Test right from the instrument GUI.
The test:
- Performs an Empty Fill Check;
- Does not include a run ID for the load cartridge test.
- Does not add data to the Result screen
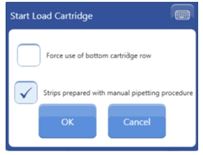
- Defaults to using the cartridge top row (but has an option to use the bottom row);
- Defaults to manual pipette mode (but when unselected the test runs a shortened sample prep script).
The 24 Sample Worklist mode must be enabled for the Load Cartridge Test to run in the GUI.
- Log in as FSVC user.
- Navigate to the Worklist screen under the Run tab
- Check if any pending tests are configured and backup the database if so.
- Navigate to the System screen under the Configuration tab.
- Under Display Options, check the Use 24 Sample Worklist box and click Save.
- Navigate to the Environmental Variables screen under the Maintenance tab, enable the variable Allow Incomplete Worklist and click Save. This allows a worklist to be configured without sample buffer tube barcodes and patient ID number.
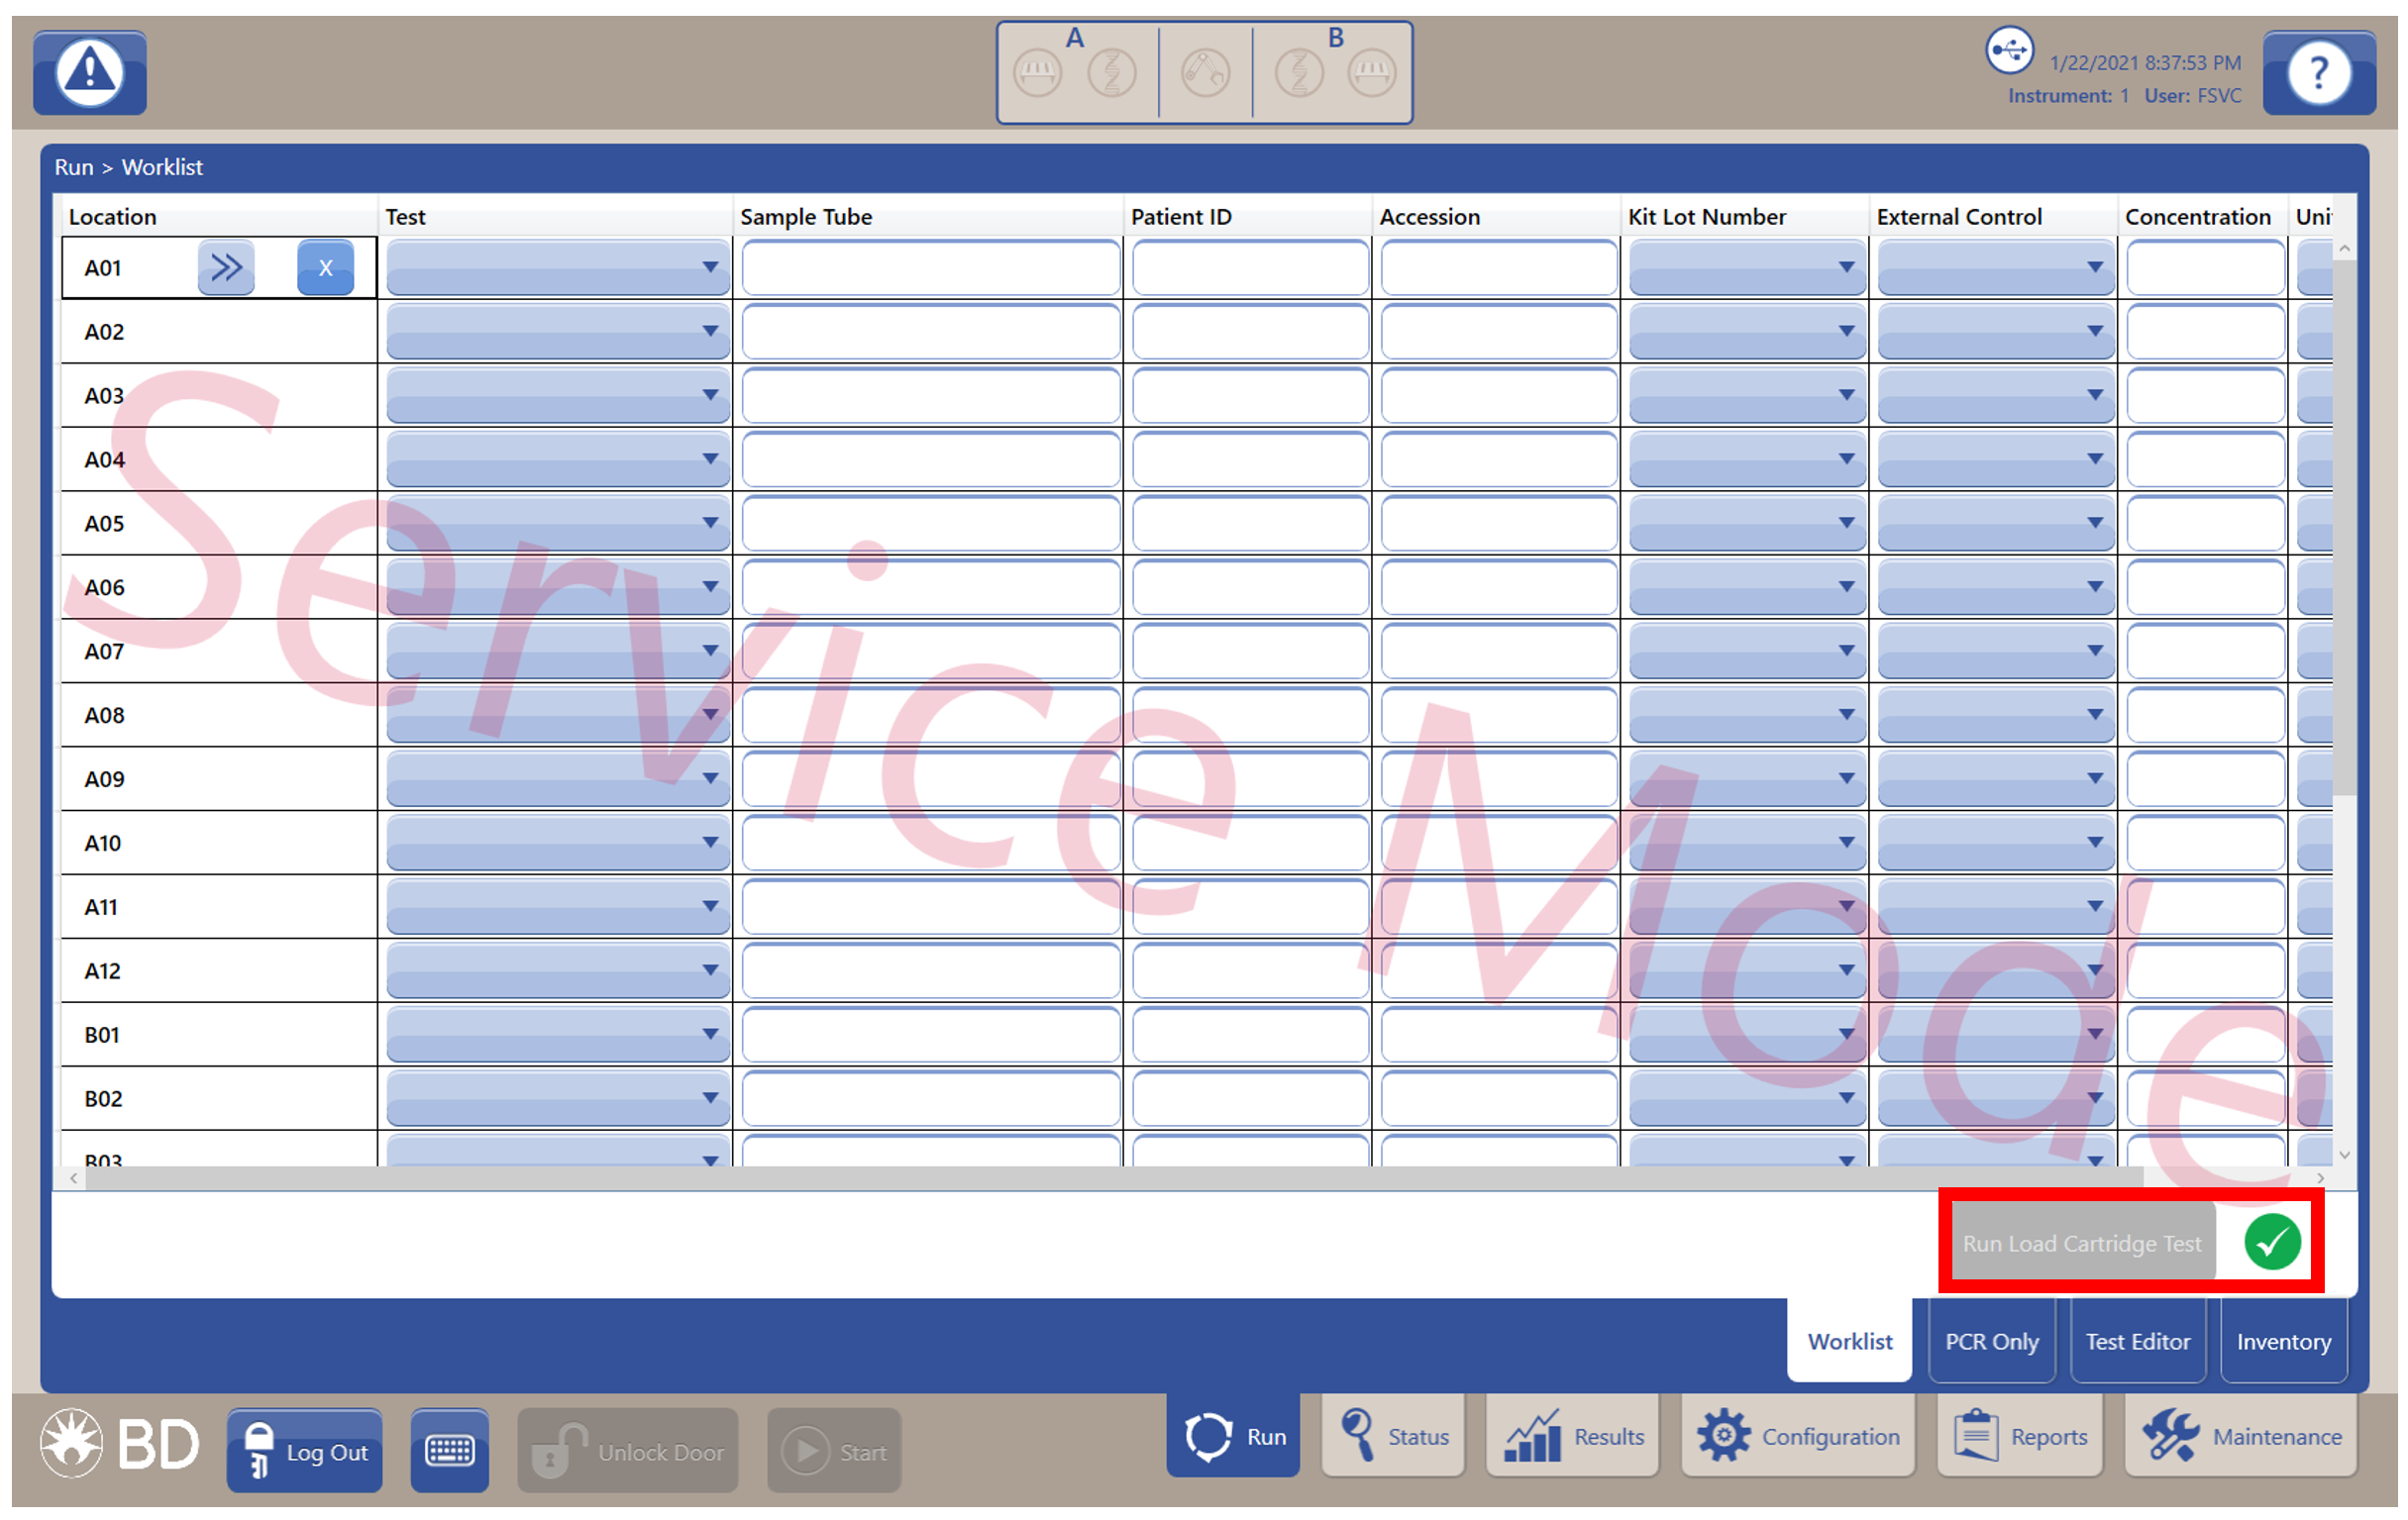
- From the Worklist screen, set up the reagents in the instrument and configure the run.
- Select the Run Load Cartridge Test button located at the lower right side of the screen.
- When the Start Load Cartridge window appears, select the desired parameters and click OK.
- Observe the instrument as the instrument performs the load cartridge process.
If the worklist had pending tests, restore the database once Load Cartridge Test completes.
- Navigate to the Environmental Variables screen under the Maintenance tab and reset the environmental variables to default.
- Configure the worklist back to the customer’s initial format.
- Log out of the system as FSVC user and verify that the Service watermark is no longer present on the screen.